
Installation
Fit it yourself, or hand us the whole room.
The tray installs the same way whichever finish goes on it — tiled up to, or microcemented over. At 30mm it drops into a recess, sits on top of an existing tiled floor, or beds level with new tile. Below is the order that works, and where we can take it off your hands.
Option A
Buy the tray, fit it yourself
You get the tray, the waste kit, the drain insert and a dimensioned spec sheet — primed for microcement, or already finished by us in the colour you picked and ready to tile up to. Warranty on the tray stands whoever fits it. Technical support by phone is free and unlimited — we’d far rather spend ten minutes on the phone than replace a tray.
Shop the traysOption B
We do tray and microcement as one job
North West only. One team, one responsibility, and the 15-year warranty covers the finished surface rather than just the tray under it. This is the only route where a failure is unambiguously ours.
Get a fitted quoteThe build-up
What actually happens on the floor.
Nothing here is secret. If you’re fitting it yourself, this is the order that works.
- 01
Set the level — three ways
Recessed: cut between the joists so the tray sits flush with the finished floor, remembering microcement adds 2–3mm, not a tile bed. Over existing tile: at 30mm the tray goes straight on top — no lifting the old floor, and you step up 30mm at the enclosure, which is lower than most shower trays on the market. Level with new tile: lay the tray, then tile up to it; a 20mm tile on 8–10mm of adhesive lands within a few millimetres of the tray edge. However you set it, bed the tray on a full layer of adhesive. No voids, no rocking. It must not move at all.
- 02
Waste and test
Connect the trap, then fill and stand the water before anything goes over it. Every leak we’ve ever been called to has been at the trap, and every one of them was findable in ten minutes at this stage.
- 03
Tape the junctions
Flexible membrane tape into the tray-to-wall angle and around the waste collar, bedded in. The tray is waterproof and the microcement is waterproof — the junction between two rigid things that move differently is where you need the flexible layer.
- 04
Prime
The tray arrives factory-primed, but the surrounding floor and walls won’t be. Prime everything the microcement will touch so the whole area drinks at the same rate; patchy suction shows up as patchy colour and there is no fixing it afterwards.
- 05
Two coats, trowelled
Base coat, mesh over the junctions, then the finish coat. Work wet edge to wet edge across the tray and out onto the floor in one pass — the point of the whole system is that there is no line where the shower stops.
- 06
Seal, then wait
Two-part polyurethane sealer, two coats. Then leave it. It takes water after 24 hours and reaches full cure at around seven days — don’t let anyone shower in it on day two because it looks finished.
Done properly
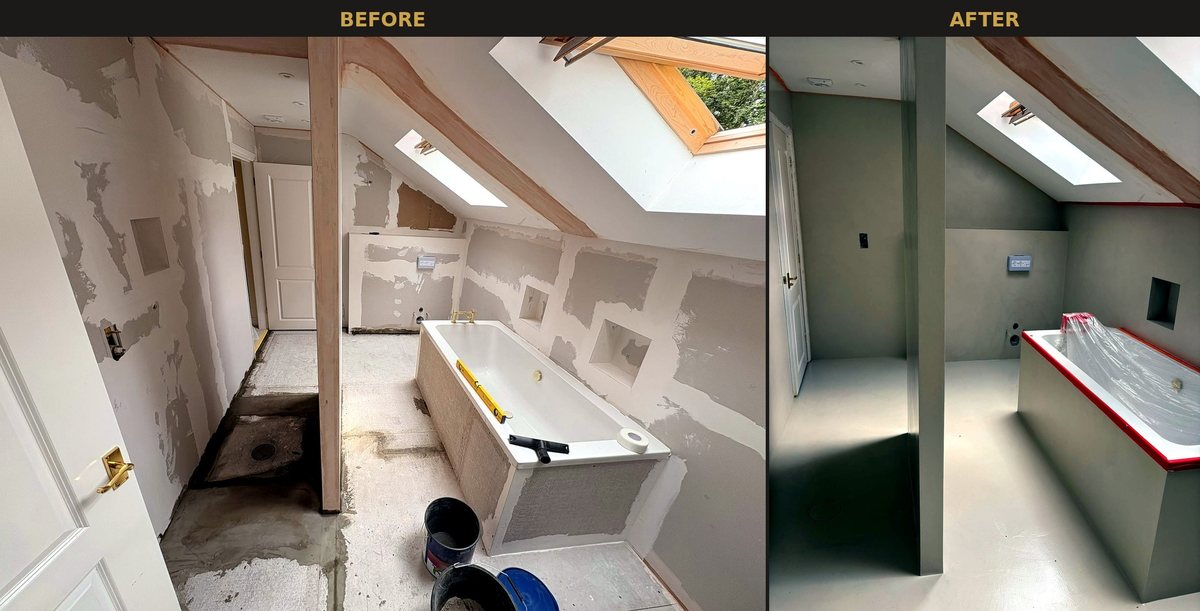
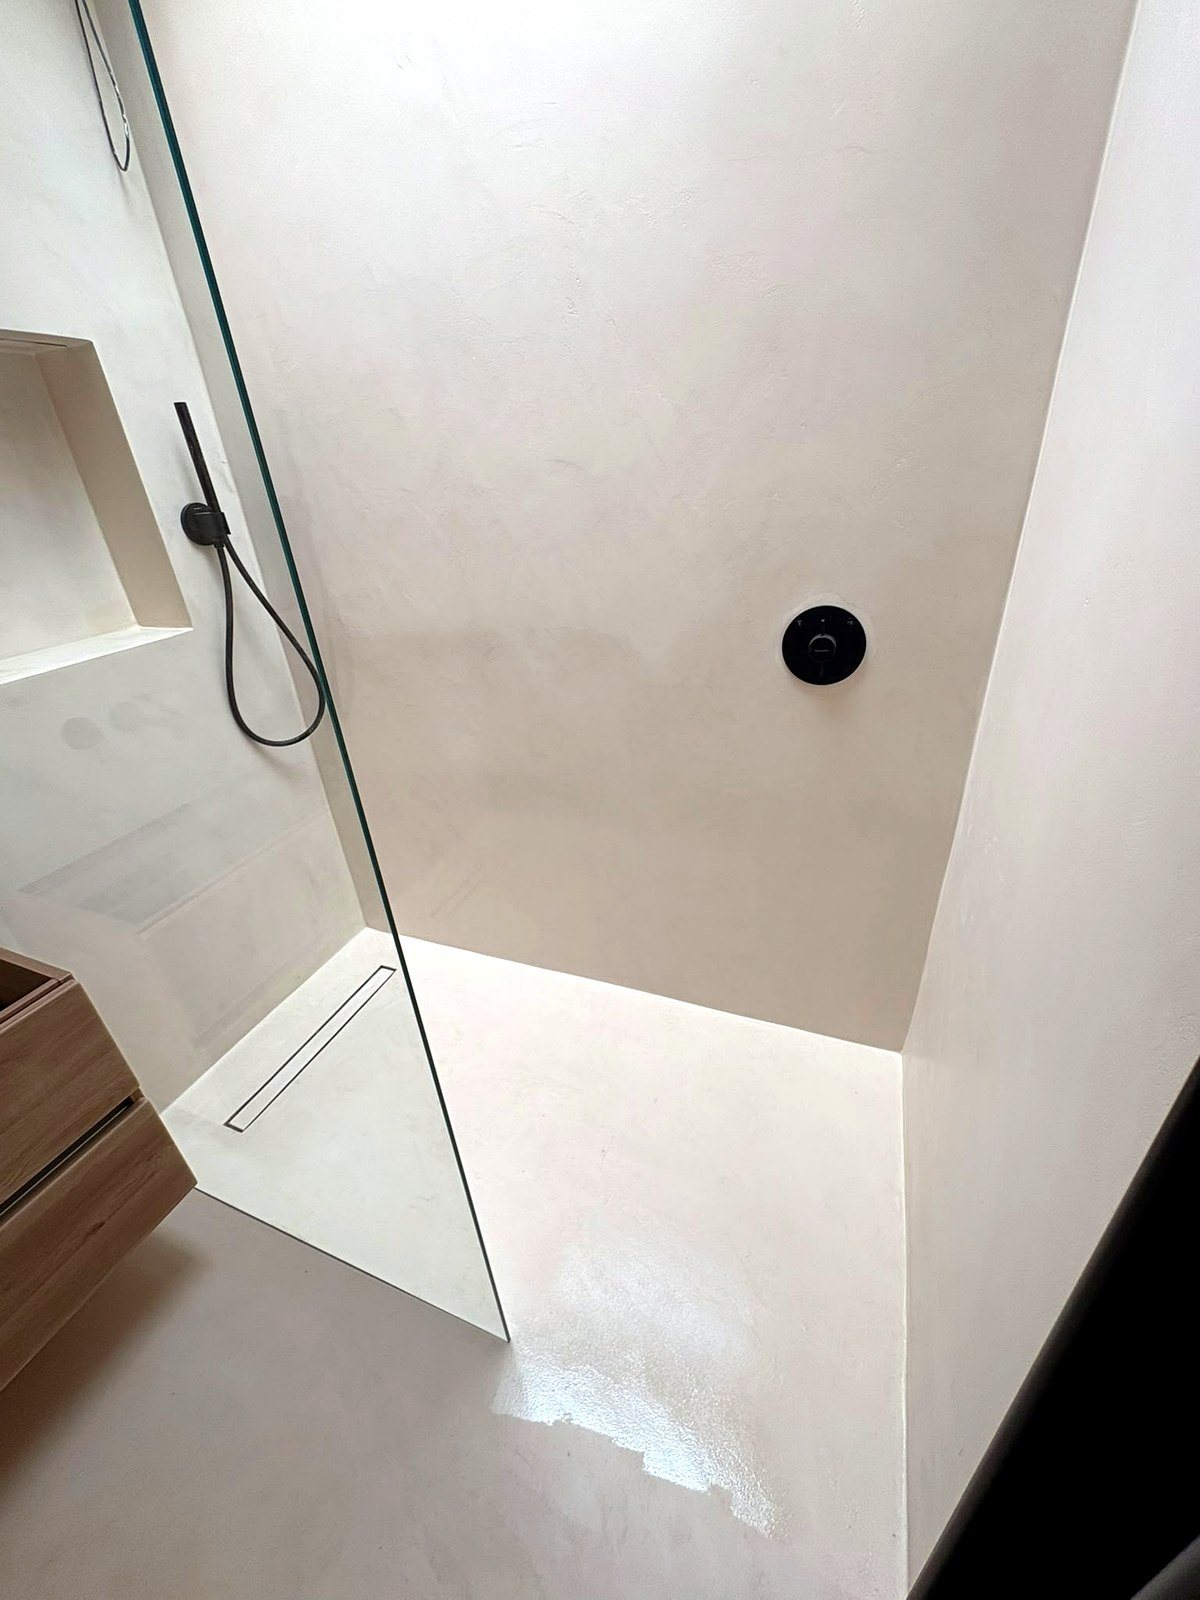
A loft ensuite, start to finish.
Awkward roof line, no room for a step, and a waste run that had to travel. Tray recessed flush, microcement carried up the wall and across the floor as one surface.
Fitter questions
Asked by people holding a trowel.
Can I cut the tray down?
Standard trays, no — the fall is moulded and cutting it destroys the geometry and the warranty. That’s exactly what the bespoke option is for: we make it to your footprint with the drain where you need it, and it arrives right.
Underfloor heating — any restrictions?
Electric mat or wet UFH under and around the tray is fine. Bring the system up to temperature slowly over several days after the sealer has cured, not on day one. Thermal shock on a green finish is one of the few ways to crack it.
Do I have to use microcement at all?
No. Plenty of these go in as ordinary low-profile trays: we finish the tray in the colour you choose, you tile up to it, and you get a colour and a profile no mainstream tray manufacturer offers. The seamless route is what the tray was engineered for, not a condition of buying it.
How much microcement per tray?
Roughly 1.2–1.6 kg/m² per coat, two coats, and you want extra for the wall run. Tell us the tray size and the wall height you’re going to and we’ll put the quantities on the quote — it’s better to have half a tub spare than to run out mid-wall.
Can it go over an existing tiled floor?
Yes — that is one of the main reasons to use a 30mm tray. If the existing tiles are sound, fully bonded and not drumming when you tap them, the tray beds straight onto them and the old floor never comes up. Where the tiles are loose or hollow, take those up and make the base good first; the tray needs to sit on something that does not move.
Not sure which tray?
Send us the size of your enclosure.
Tell us the opening and where your waste runs, and we’ll tell you which tray fits — or quote a bespoke one. Same day, usually within the hour.